Things Grandpa Figured Out
Practical gardening lessons, old-fashioned know-how, and ways to make the most of what you have.
Grandpa Says: Holly Planting, Winter Care, Feeding, and Ongoing Care
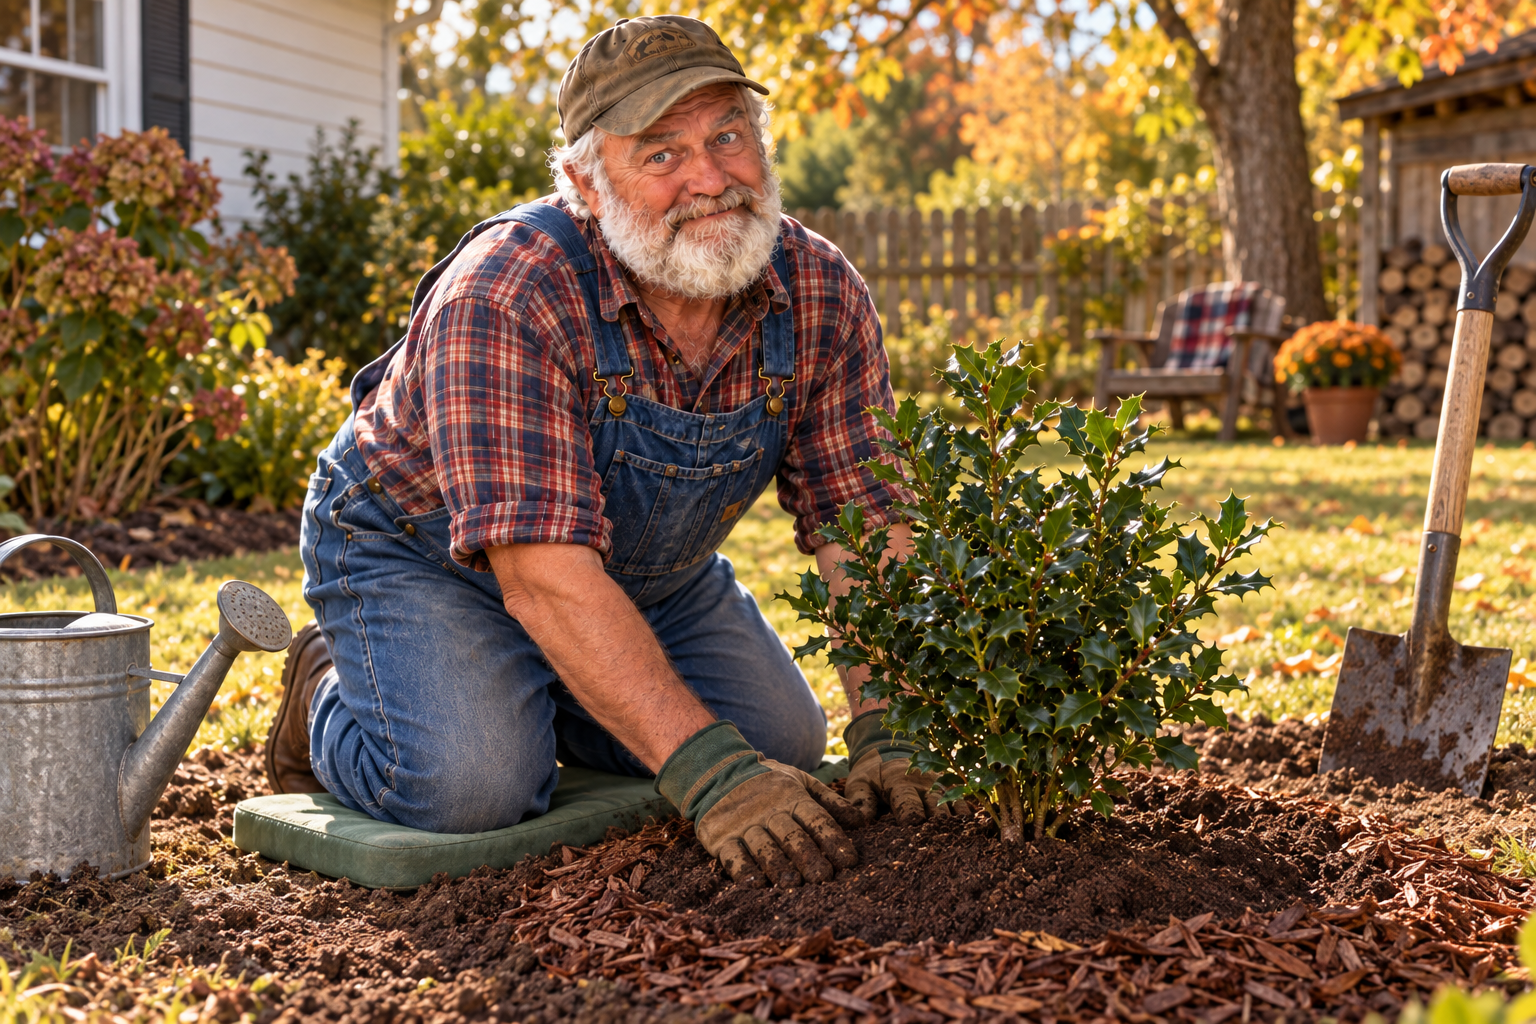
Planting a holly is a promise to the future. That little pot can become a handsome evergreen, but the first job is giving its roots a place where they can settle in. Here’s how Grandpa would walk you through planting a container-grown Nellie R. Stevens holly and caring for it afterward.
1. Pick Its Forever Spot
Nellie R. Stevens holly grows in full sun to partial shade and prefers acidic, well-drained soil. Avoid places that stay wet. It can become a substantial plant: NC State lists a mature height of 15–30 feet and width of 8–25 feet. Plan for that growth around foundations, walks, driveways, and overhead space. For a screen, choose spacing based on the mature width and how much pruning you intend to do—not the size of today’s pot. NC State’s Nellie R. Stevens holly guide.
2. Make the Hole Wide, Not Deep
Water a dry root ball before planting. Slide the pot off while supporting the root ball; don’t pull the plant out by its stem. Find the first main roots near the top, brushing away excess potting mix if necessary. Gently loosen circling outer roots; tightly bound woody roots may need careful pruning.
Dig a hole roughly two to three times the root ball’s width, but only deep enough to keep the first main roots at or slightly above the surrounding soil. Rest the root ball on firm, undisturbed soil so it won’t sink. Roughen smooth hole sides. A deep cushion of loose dirt underneath can settle and leave the plant buried too deeply. Refill around the sides with the soil you dug out, gently settling it with water rather than stomping it hard. Keep soil off the stem. University of Maryland planting guidance.
3. Feed According to the Soil Test
Start with a soil test. Established hollies growing well may need little or no fertilizer. Yellow leaves or weak growth can also come from drainage, drought, damaged roots, or unsuitable soil pH; more fertilizer will not fix those problems.
Do not put a concentrated fertilizer layer under the root ball. When feeding is recommended, use the type and amount your soil test calls for, follow the label for newly planted or established shrubs, and spread it over the root zone rather than against the trunk. Account for fertilizer already applied to nearby lawn.
What about winter feeding? A holly does not need an automatic winter dose. Plan any needed feeding around active growth and local Extension advice, often beginning in spring. Avoid trying to force tender late-season growth with a heavy nitrogen application. Do not fertilize a drought-stressed plant. Clemson Extension explains how to decide what, when, and how much to feed.
4. Water the Roots, Not Just the Surface
Water slowly after planting so the entire root ball and surrounding backfill become moist. Check the root ball itself frequently during the first weeks; it can dry out even when nearby garden soil feels damp. Keep it moist, not waterlogged, adjusting to rain, heat, soil drainage, and the plant’s condition.
As roots spread, water a broader area. Don’t assume a quick lawn-sprinkler cycle reaches the roots, and don’t follow a rigid schedule when the soil is already wet. Keep watching through the first growing seasons. Established Nellie R. Stevens hollies tolerate dry weather better than newly planted ones. University of Minnesota watering guidance.
5. Mulch Like a Ring, Not a Mountain
Spread about 2–3 inches of organic mulch over the planting area, leaving several inches clear around the stem. Mulch helps retain moisture and reduces competition from grass and weeds. Keep the root flare visible, and check existing mulch depth before adding more next year. University of Maryland mulching guidance.
6. Help Your Holly Through Winter
Evergreen leaves keep losing moisture in winter. Dry wind and frozen soil can leave a holly with browned leaf edges even though the weather is cold. Check moisture during dry spells, especially around a newly planted root ball, and water when the soil is unfrozen and needs it. Keep the mulch ring in place without burying the trunk.
Keep deicing salts and salty runoff away from the planting area. Do not strike or shake ice-coated branches; frozen branches can break. After cold damage, wait for spring growth to show what is still alive before making major corrective cuts. University of Maryland Extension’s winter-damage guide.
7. Keep Up With Pruning and Ongoing Care
Let the plant’s natural pyramidal shape do most of the work. Prune to shape in winter, using clean, sharp tools. Check leaves and stems when you water: persistent yellowing, dieback, or insects deserve a closer look before you reach for fertilizer or a spray. Nellie R. Stevens can produce some berries without a male holly, though a suitable pollinizer can improve fruiting. Its berries are for ornamental interest, not snacking. More about this holly’s growth and care.
Grandpa’s reminder: A wide hole, the right planting depth, steady moisture, and a little patience are worth more than rushing to make a small plant grow big overnight.
Grandpa’s Wisdom · Tool Care
Grandpa Says: A Good Pair of Pruners Deserves a Little Care
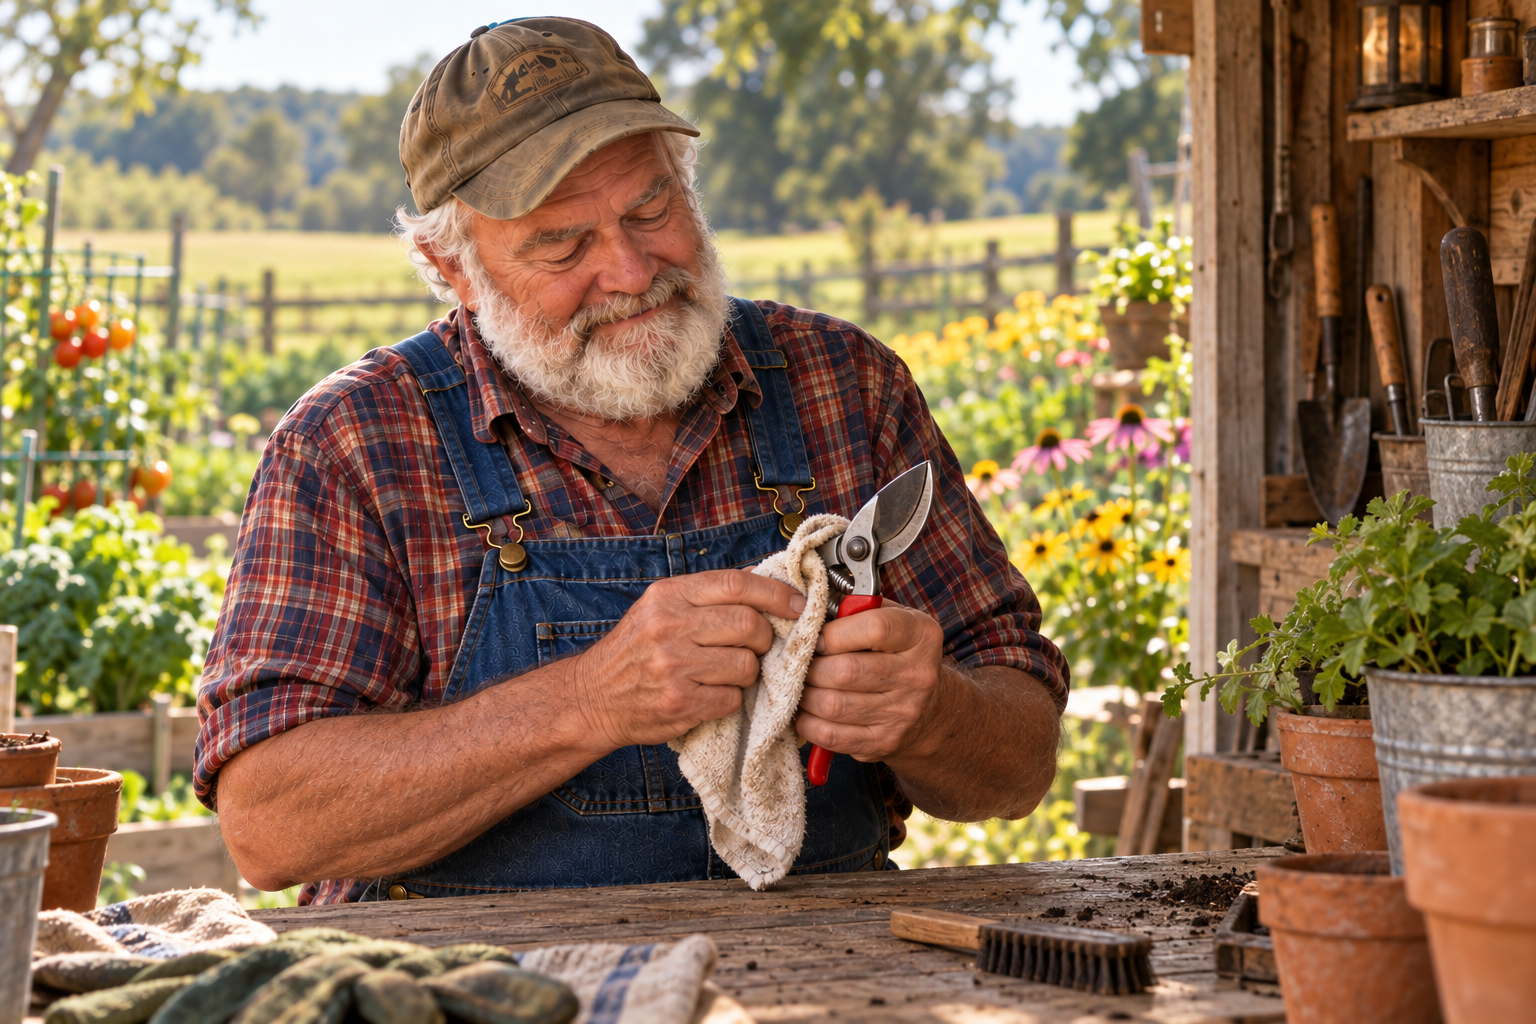
A pair of pruning shears ought to make gardening easier. If you’re wrestling with every branch, stop and find out why. The stem may be too big, the blade may be dull, or yesterday’s sap may be making everything stick. More muscle isn’t always the answer.
Here’s Grandpa’s practical guide to using bypass pruners like the Garden Guru Classic Bypass Pruning Shears Clippers (Black), then putting them away ready for the next job.
Start With a Stem the Tool Can Handle
Bypass pruners have a curved cutting blade that passes beside a broader supporting blade, much like scissors. They make clean cuts on small living stems. Start with a slender stem that fits comfortably between the open blades. Keep your free hand and fingers clear, and squeeze steadily. If you have to twist, wrench, or force the handles, stop and use loppers or a pruning saw suited to the branch.
Look at the cut. A smooth cut is what you want; crushed fibers or torn bark mean something needs attention. Clean the blades and check their condition before trying again. Cutting wood that is too large can damage both the plant and the pruners. University of Maryland Extension: choosing and using pruning tools.
Decide Where to Cut Before You Squeeze
When shortening a small shoot, find a healthy bud and cut about a quarter inch above it. Don’t leave a long bare stub. When removing a branch at its base, preserve the slightly swollen branch collar instead of cutting flush against the trunk. And check the plant’s pruning season first: pruning a spring-flowering shrub at the wrong time can remove the buds you were waiting to see. RHS pruning guide; University of Minnesota Extension: pruning trees and shrubs.
Clean Them Before You Put Them Away
Brush off loose debris, then use a cloth or brush with soap and water to remove sap and dirt. Keep your fingers away from the cutting edge. Dry the metal thoroughly, including around the spring and pivot. Don’t leave the tool wet in a bucket or buried in damp garden clippings.
A little suitable tool oil on the pivot and spring helps movement; a thin protective film on exposed metal helps discourage rust. Wipe away excess oil. Follow the maker’s care directions, especially if a blade has a protective coating. Avoid an overnight vinegar soak: it can damage metal and coatings. University of Minnesota Extension: caring for pruning tools.
Cleaning and Disinfecting Are Different Jobs
Removing sap and soil cleans the tool. Disinfecting helps prevent carrying plant disease to another plant. Clean first, then use 70% isopropyl alcohol to wipe or spray the blades between plants, particularly when disease is suspected. Let them air-dry and keep alcohol away from heat and flames. Alcohol does not control every plant pathogen reliably; for a diagnosed disease such as fire blight, follow disease-specific Extension guidance. Follow any disinfectant’s label, including contact time. University of Minnesota Extension: cleaning and disinfecting garden tools.
Sharpen the Cutting Edge, Not Every Surface
Clean the pruners first. Open and hold them securely, with the cutting edge directed away from your body. Use a small diamond sharpener and follow the cutting blade’s existing bevel—the sloping face already ground into it. Make controlled strokes along that angle. Remove only enough metal to restore the edge; don’t invent a steeper angle or grind a new shape.
Sharpen the beveled side only. If sharpening leaves a fine burr on the flat back, lay the sharpener flat against that back and remove the burr lightly. Don’t create a second bevel there, and don’t sharpen the supporting hook as though it were another cutting blade. Only take the pruners apart if their instructions allow it and you know how to reassemble them. A chipped or bent blade needs repair or replacement advice. RHS: sharpening hand tools.
Give Them a Dry Home
Check that the handles move smoothly and the safety lock works. Close and lock the dry pruners before storing them somewhere children cannot reach. Next time, test on a small appropriate stem before tackling the rest of the plant.
Grandpa’s rule: Spend a few minutes taking care of your tools, and you won’t start tomorrow’s gardening by fixing yesterday’s neglect.
Grandpa’s Pick: Bypass Pruning Shears
Grandpa’s Wisdom · Money-Saving Ideas
Grandpa Says: You Don’t Need a Shed Full of Tools to Start a Garden
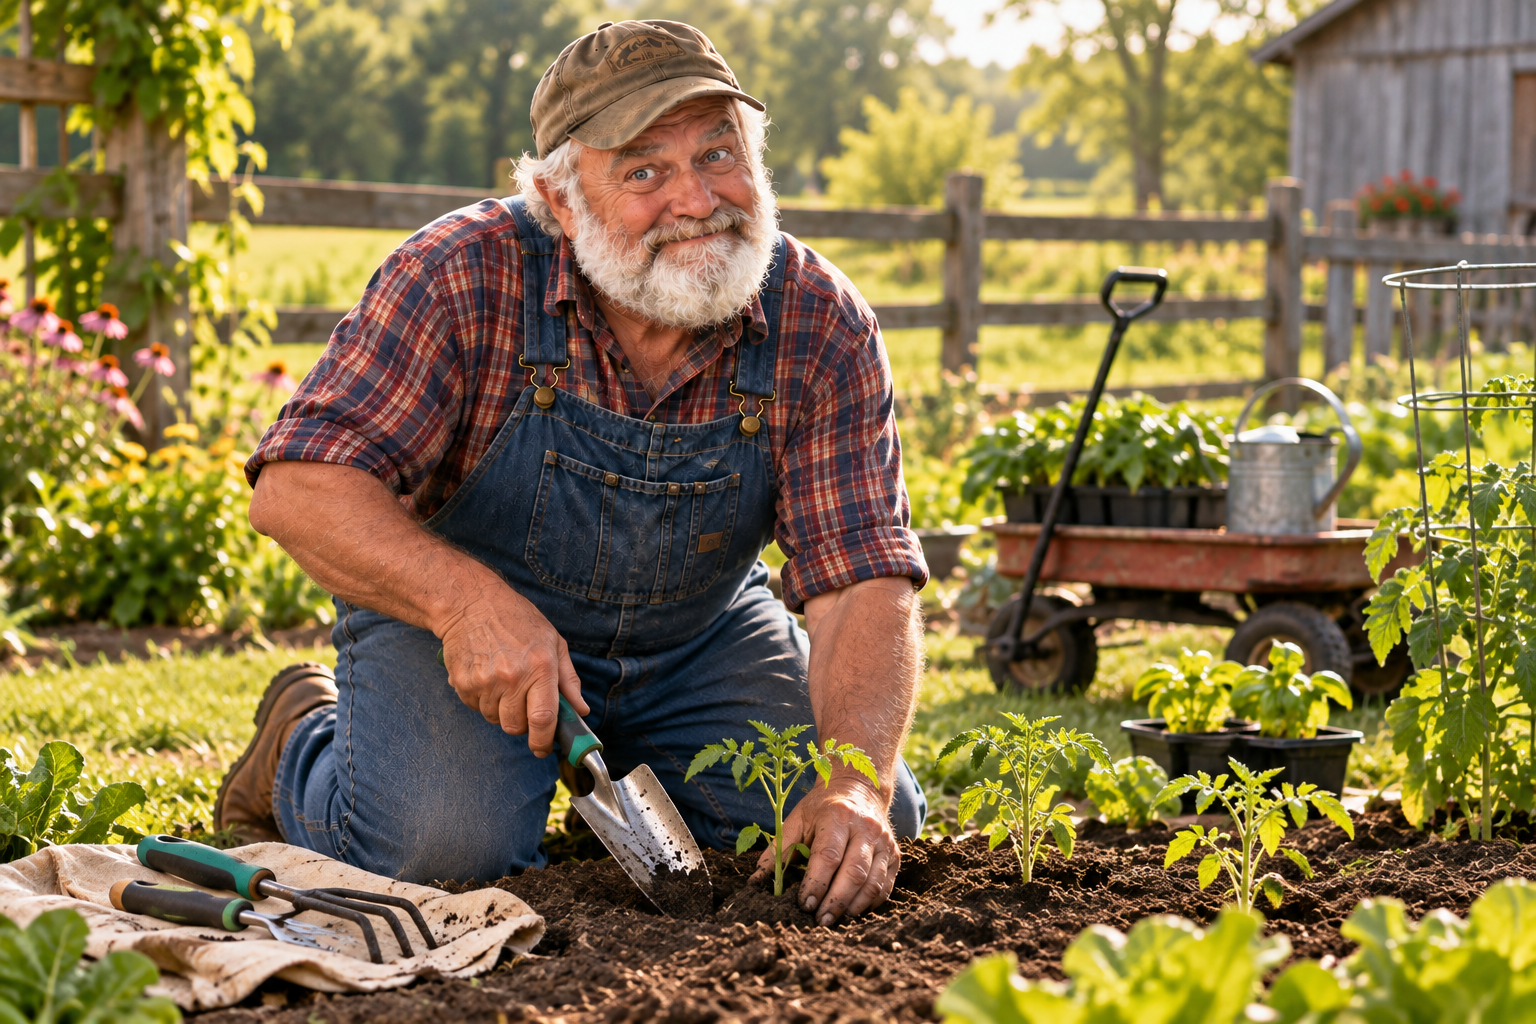
Grandpa used to say there were two ways to buy tools: buy what you need, or buy what somebody convinced you that you need.
Gardening really doesn’t require a shed full of expensive equipment. For most everyday jobs around the flower bed, vegetable garden, or porch planters, a handful of good hand tools will handle most of the work.
Know What Your Tools Are For
Buying the right tools is only half the job. You need to know how to use them. Most of these little hand tools are simple, but using the wrong one—or using the right one the wrong way—can damage a plant just as easily as help it.

The Trowel
Think of your trowel as a little handheld shovel.
When you’re planting a flower or vegetable transplant, push the blade into the soil beside where you want the plant. Pull the handle toward you to loosen the soil, then work your way around until you’ve opened a hole wide enough for the root ball.
Don’t automatically dig a deep hole. For most transplants, you want the plant sitting at roughly the same soil level it was growing at in its container. Tomatoes are an important exception because they can generally be planted deeper and form roots along buried portions of the stem.
After setting the plant in place, use the trowel to pull soil gently back around the roots and lightly firm it with your hands.
The Transplanter
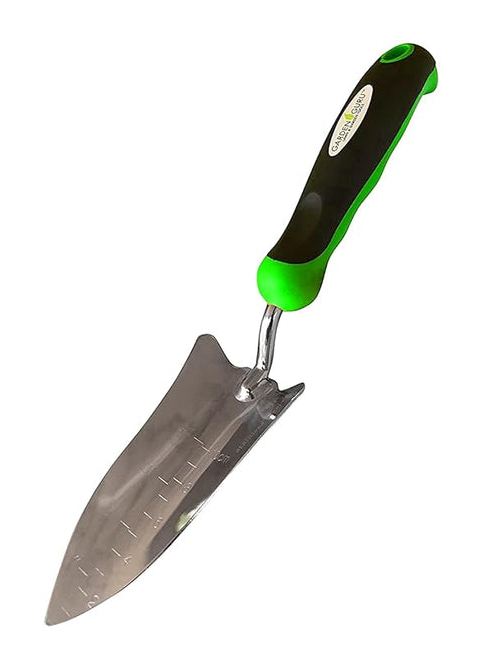
That long, narrow blade isn’t just a funny-looking trowel.
A transplanter is useful when you need a deep, narrow hole without disturbing a lot of surrounding soil. Push it straight into loose soil, work it gently back and forth, and remove enough soil to make room for the young plant’s roots.
Many transplanters also have depth markings on the blade. If yours does, use them. They’re especially handy when you’re trying to plant several things at approximately the same depth.
Don’t cram a large root ball into a hole that’s too narrow. If the roots have to be crushed or folded to fit, make the hole larger.

The Hand Rake
A hand rake is for the jobs where the big garden rake is simply too much.
Hold it lightly and pull it across the surface of the soil to gather leaves, dead plant material, small stones, and other debris. You can also use it to smooth freshly worked soil before planting.
Around established plants, use short, gentle strokes.
Don’t bury those teeth deeply beside a plant and start yanking. There may be feeder roots just underneath the surface that you can’t see.

The Weeder
Here’s where a lot of people waste their time: they pull the top off a weed and leave the root behind.
Instead, place the working end of the weeder beside the weed and push it into the soil toward or underneath the root. Use the handle for gentle leverage to loosen the root, then pull the weed out.
Your goal isn’t a weed with no leaves. Your goal is a weed with its root attached.
This is especially important with weeds that can regrow from roots or underground structures. And if the soil is hard as concrete, don’t fight it—weed after rain or watering when the ground is easier to work.

The Cultivator
Those curved prongs are made for scratching and loosening the upper layer of soil, not digging halfway to China.
Pull the cultivator through the top of the soil with short strokes. It can break a light surface crust, disturb tiny emerging weeds, and help work a modest amount of compost or amendment into the upper soil.
But be careful around established plants.
The closer you get to the stem, the shallower and gentler you should work, because roots may be immediately underneath you. Deep cultivation can cut the very roots you’re trying to help.

The Hand Fork
A hand fork is one of those simple tools that becomes surprisingly useful once you learn it.
Push the tines into compacted or clumpy soil and gently rock the handle to loosen it. Work a little area at a time rather than trying to pry up a huge chunk of earth.
It’s also useful for incorporating compost into the surface of a garden bed.
Around a plant, don’t stab blindly toward the center. Start farther away and work carefully. If you feel resistance that might be a substantial root, don’t force the fork through it—move over.
One Rule Applies to All Six
Grandpa would probably put this more simply: Pay attention to what’s underneath your hands.
Roots don’t announce themselves before you cut them. Irrigation tubing doesn’t either. Work carefully around established plants, use the smallest tool that will comfortably do the job, and don’t use brute force when a little patience will work better.
Grandpa’s Pick
You don’t have to buy all six tools separately. The Garden Guru Stainless Steel 6-Piece Gardening Tool Set puts those basic hand tools together in one set—the same tools pictured in the lessons above.
They’re the kinds of tools a beginning gardener can actually use instead of buying a bunch of equipment that spends most of its life hanging on a wall.
Take Care of What You Have
Here’s something Grandpa and Grandma’s generation understood pretty well: Saving money isn’t only about what you pay. It’s about how long you make something last.
When you’re finished gardening, knock or rinse the soil off your tools. Dry them before putting them away. Don’t leave them lying in wet grass or sitting outside in the rain.
Every so often, check the edges and sharpen the tools that are designed to have a cutting edge. A decent garden tool that’s cleaned, dried, maintained, and put away properly can serve you for years.
You don’t need the fanciest tools. You don’t need the biggest collection. You need the right tools, and you need to take care of them.
— Grandpa’s Wisdom
Living Holly Ranch & Nursery
Rooted in Faith • John 3:16
Grandpa’s Wisdom · Small-Space Gardening
Grandpa’s Little Greenhouse: A Head Start on the Garden, a Quiet Evening on the Porch
“A little greenhouse gives you a place to begin,” Grandpa says. “A few tomato seedlings, some herbs for Grandma’s kitchen, a tray of cuttings—and pretty soon, you’re thinking about what you could grow next.”
Picture a small backyard with a greenhouse, a couple of growing beds, and two comfortable chairs waiting on the porch. That is the garden Grandpa would plan: room to work, room to learn, and somewhere for him and Grandma to sit in the evening and enjoy what they’re growing.

Give the Little Greenhouse a Useful Job
The Sago Greenhouse 5′ × 8′ is an aluminum-and-glass kit with a ridge vent and double doors. Check its actual blueprint dimensions, foundation requirements, and selected package before planning benches or accessories. Shelving and growing supplies shown in photos should not be assumed to be included.
Grandpa’s plan would be to use it as the garden’s starting room. Young plants begin here, then move into outdoor beds or larger pots. That leaves room for another batch. Fill it with mature plants too early and there won’t be much space left to work.
Choose a sunny, well-drained site with convenient water access. Keep the doorway and a comfortable working aisle clear; measure benches against the actual interior, and leave room for light and air around plants. A thermometer that records the daily high and low is a useful starting tool.
Glass does not guarantee frost protection. An unheated greenhouse can become too cold overnight and too hot on a sunny day. Plan ventilation, shade when needed, and reliable temperature protection appropriate to your crops. The ridge vent is useful, but watch actual temperatures rather than assuming it handles every condition. University of Georgia’s hobby-greenhouse guide explains siting and climate control.
Start With Tomatoes—and a Calendar
“The trick isn’t starting the earliest,” Grandpa says. “It’s having a healthy plant when the garden is ready for it.”
- Count backward. Sow tomatoes about five to six weeks before your expected outdoor planting date, adjusting for your local conditions and seed directions. Wait for suitable warmth and frost-free weather before planting outside.
- Use clean containers with drainage and fresh seed-starting mix. Moisten the mix, sow at the packet’s depth, and label the variety and date. Keep it evenly moist without leaving it waterlogged.
- Give seedlings adequate warmth and light. Remove germination covers after emergence. Cold nights may mean starting indoors first; weak winter light may call for a grow light. A sunny-looking greenhouse is not automatically warm enough for tomato seedlings.
- Make room as they grow. Pot up crowded seedlings and handle them gently by a leaf rather than squeezing their stems.
- Ease them outdoors. Over roughly a week or two, gradually increase exposure to outside sun and wind. Watch moisture and bring tender plants back under protection when needed.
Maryland Extension’s seed-starting guide and Minnesota Extension’s tomato guide provide more detail.
Grow a Little Variety Without Planting Everything at Once
The Community Garden Survival Seed Vault offers a broad selection for planning several seasons. Read its variety list and individual seed instructions; a small greenhouse does not need all 120 varieties growing at once. The “Grow an Herb Garden” Cooking Herbs Seed Kit is another option for a kitchen-garden project.
For a first season, Grandpa would make a short list: a manageable batch of tomatoes, a few herbs, and something to brighten the garden. Write down what germinated, what struggled, and what the family actually used. Next year’s planting plan starts with those notes.
Try a Tray of Cuttings
Seed starting is only one use. Mint, coleus, and geraniums are examples of plants that can be propagated from stem cuttings. Start with healthy parent plants and follow directions for that species. Make a clean cut, remove the lower leaves, and place the cutting in a suitable moist rooting medium. Give it bright indirect light and appropriate humidity; a covered tray sitting in direct greenhouse sun can overheat.
Keep different batches labeled and check them regularly. Once rooted, gradually adjust them to ordinary growing conditions and pot them on. Rooting success and timing vary by plant—one method will not suit everything. Iowa State’s stem-cutting guide is a useful next lesson.
A pair of Classic Bypass Pruning Shears can help with suitable stems; use a finer tool for delicate work. Grandpa’s pruner-care guide covers cleaning and maintenance.
Could This Be the Beginning of a Backyard Nursery?
It can be a practical propagation hub for a small backyard operation. The important word is beginning: seedlings take less room than the larger pots they eventually need. Outdoor growing space, water, dependable care, and a place to harden plants off matter just as much as the greenhouse.
Try an example batch of 12 tomatoes, 12 herbs, and 12 cuttings. Those 36 starts are a planning exercise, not a promised yield or capacity rating. Measure your trays, allow spacing as plants grow, and plan where every larger pot will go. Track seed, potting mix, containers, heating, losses, and your time before deciding whether selling plants makes sense. Before offering plants for sale, check the nursery requirements and propagation permissions that apply to your location and varieties.
Give It a Job Through the Seasons
- Late winter and spring: start the transplants your garden needs when you can provide suitable temperatures and light.
- Summer: use suitable protected space for cuttings and potting work, while managing heat. There is no prize for filling an overheated greenhouse.
- Late summer and fall: plan another batch for your local fall planting window, or try cool-season greens where conditions allow.
- Winter: clean, organize, plan, and protect only plants whose temperature needs you can meet.
Move From the Bench to the Garden
A six-piece gardening tool set helps with outdoor transplanting and bed care. Grandpa would keep a wheelbarrow handy for bulk material, or use the folding garden wagon to move pots and supplies along a suitable path. Secure trays and check the wagon’s selected specifications before loading it.
Outside, choose a bed that fits your space: the 4 × 2 ft. oval raised bed or the 6 × 3 ft. rectangular raised bed. These are outdoor growing destinations in this plan, not benches to squeeze inside the greenhouse. The raised beds with an arch trellis offer another layout to consider; match climbing crops and their mature weight to the structure’s specifications.
Then Put the Tools Away and Sit With Grandma
Before supper, Grandpa would make one last check of the plants, the weather, and the greenhouse ventilation. Then the tools get cleaned, the wagon gets parked, and the evening belongs to the two of them.
The three-piece patio bistro set with blue cushions gives this little garden plan a place to rest: two rocking chairs and a table on a firm, level porch or patio. Somewhere to set a cool drink, talk about tomorrow, and notice the garden instead of always working in it.

If roses are part of that view, the Peggy Martin Climbing Rose belongs in an outdoor spot with room and substantial support. Grandma’s climbing-rose article explains planting and care.
Grandpa’s reminder: “Grow enough to keep learning. Leave enough room to keep enjoying it. And don’t work so late that you miss sitting in the garden with somebody you love.”